手把手教你把 Codex 默认模型换成智谱 GLM-5.3-Flash,直连官方 API
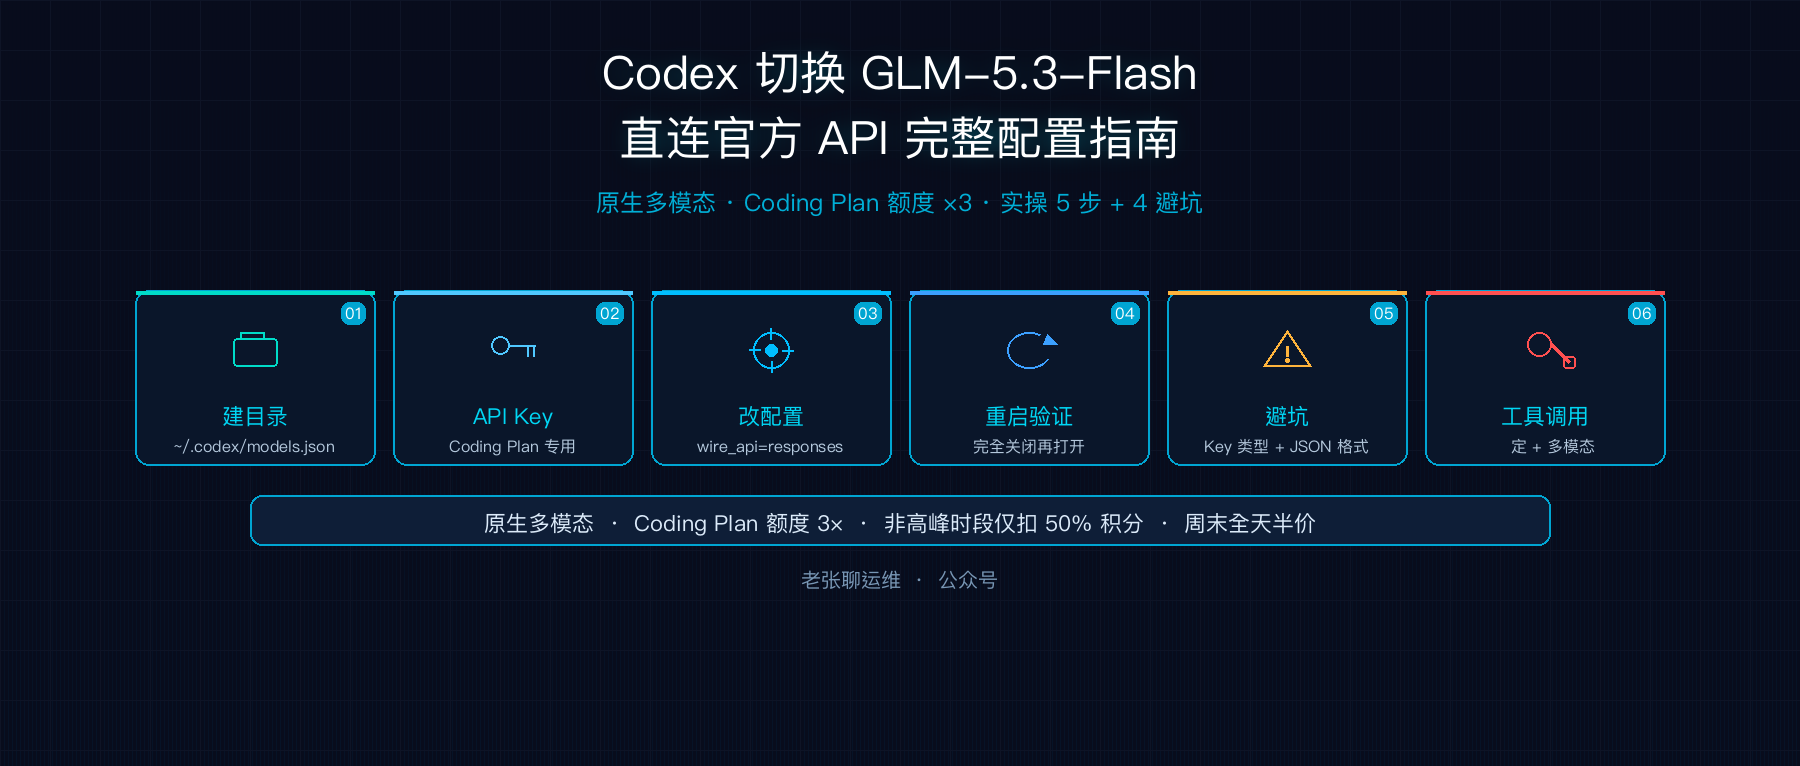
最近智谱的 GLM-5.3-Flash 挺火的,原生多模态、Coding Plan 额度翻 3 倍,价格还便宜。作为一个天天用 Codex 的运维人,我第一时间就想把默认模型切过去。
折腾了一下,踩了几个坑,把完整过程记录下来,给需要的朋友参考。
先说结论
可以用,而且效果不错。
GLM-5.3-Flash 原生支持视觉能力,配合 Codex 的浏览器插件,能做到"看图写代码、截图找 bug",这个体验是纯文本模型比不了的。
你需要准备什么
- Codex 桌面应用(macOS 或 Windows 都行)
- 智谱 Coding Plan 账户(个人版/团队版都可以)
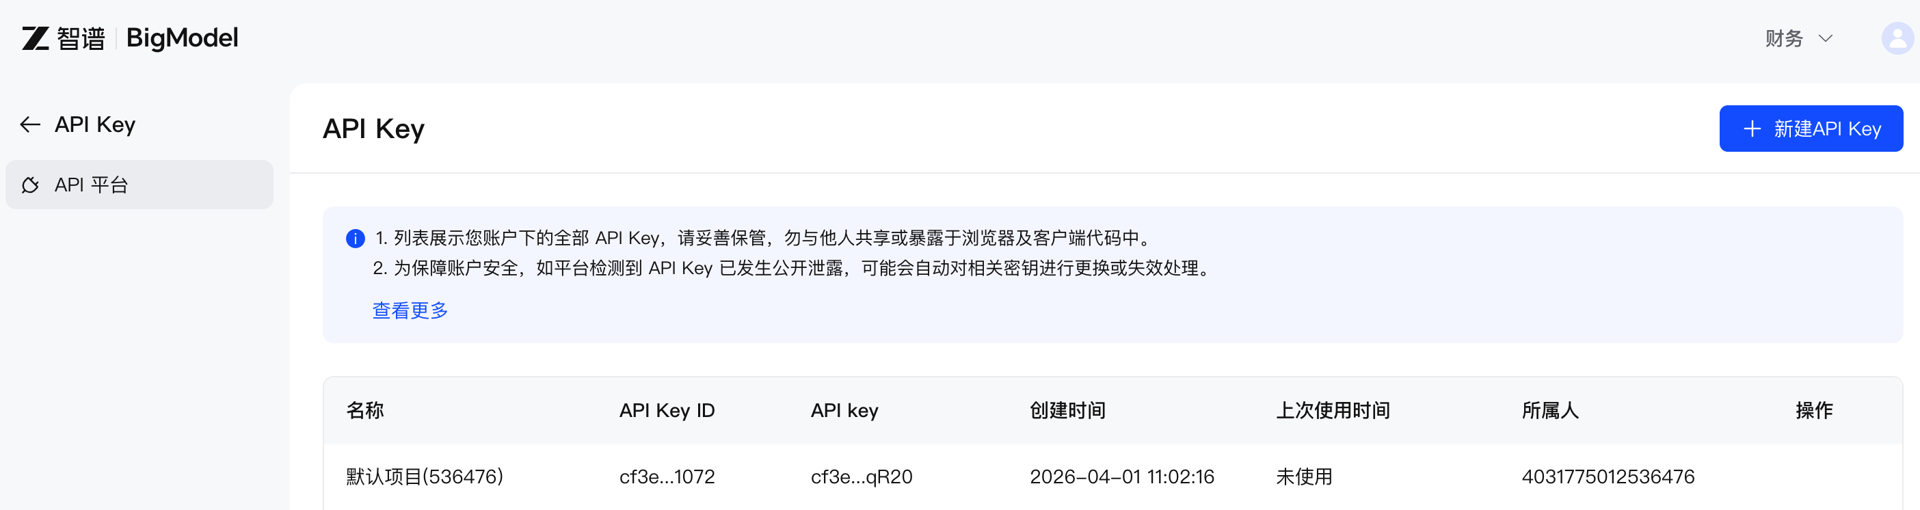
- Coding Plan 的 API Key(在套餐概览页面新建)
注意:Coding Plan 的 API Key 和智谱开放平台的通用 Key 不是一回事,要用专门的 Coding Plan Key。
完整配置步骤
第一步:获取 API Key
登录智谱开放平台,进入「个人编程套餐」→「套餐概览」,新建一个 API Key。
复制保存好,后面要用。
第二步:创建模型目录文件
Codex 需要一个 models.json 文件来识别第三方模型。
打开终端,创建文件:
mkdir -p ~/.codex
然后在 ~/.codex/models.json 里写入 GLM-5.3-Flash 的模型定义:
{
  "models": [
    {
      "slug": "glm-5.3-flash",
      "display_name": "GLM-5.3-Flash",
      "description": "Z.ai's latest multimodal coding model with vision",
      "default_reasoning_level": "max",
      "supported_reasoning_levels": [
        {
          "effort": "low",
          "description": "Light reasoning"
        },
        {
          "effort": "high",
          "description": "Enhanced reasoning"
        },
        {
          "effort": "max",
          "description": "Deep reasoning"
        }
      ],
      "shell_type": "shell_command",
      "visibility": "list",
      "supported_in_api": true,
      "priority": 0,
      "base_instructions": "",
      "supports_reasoning_summaries": true,
      "default_reasoning_summary": "none",
      "support_verbosity": false,
      "apply_patch_tool_type": "freeform",
      "truncation_policy": {
        "mode": "bytes",
        "limit": 10000
      },
      "context_window": 1048576,
      "max_context_window": 1048576,
      "effective_context_window_percent": 95,
      "supports_parallel_tool_calls": true,
      "experimental_supported_tools": [],
      "input_modalities": [
        "text",
        "image"
      ]
    }
  ]
}
几个关键参数说明:
context_window: 1048576—— 1M 上下文,够吃input_modalities: ["text", "image"]—— 支持多模态,视觉能力要开default_reasoning_level: "max"—— 默认开最强推理,写代码用 max 更稳
第三步:修改 Codex 主配置
编辑 ~/.codex/config.toml,把模型提供商改成智谱直连:
model_provider = "ZAI"
model = "glm-5.3-flash"
model_reasoning_effort = "max"
disable_response_storage = true
model_catalog_json = "/Users/deo/.codex/models.json"

[model_providers]
[model_providers.ZAI]
name = "ZAI"
base_url = "https://open.bigmodel.cn/api/v1"
experimental_bearer_token = "你的Coding Plan API Key"
wire_api = "responses"
重点注意:
wire_api必须是responses,不能写成chat或其他model_catalog_json路径要和上一步的文件对应experimental_bearer_token填你的 Coding Plan API Key
第四步:清理旧配置(可选但建议)
如果你之前用过 cc-switch 之类的本地代理,建议把旧的 [model_providers.custom] 配置删掉,避免混淆。
比如我之前的配置里有这段:
# 删掉这段旧的本地代理配置
[model_providers.custom]
name = "zhipu_glm"
wire_api = "responses"
requires_openai_auth = true
base_url = "http://127.0.0.1:15721/v1"
直连官方 API 更稳定,也少了一层代理的延迟。
第五步:重启 Codex 验证
完全关闭 Codex,重新打开。
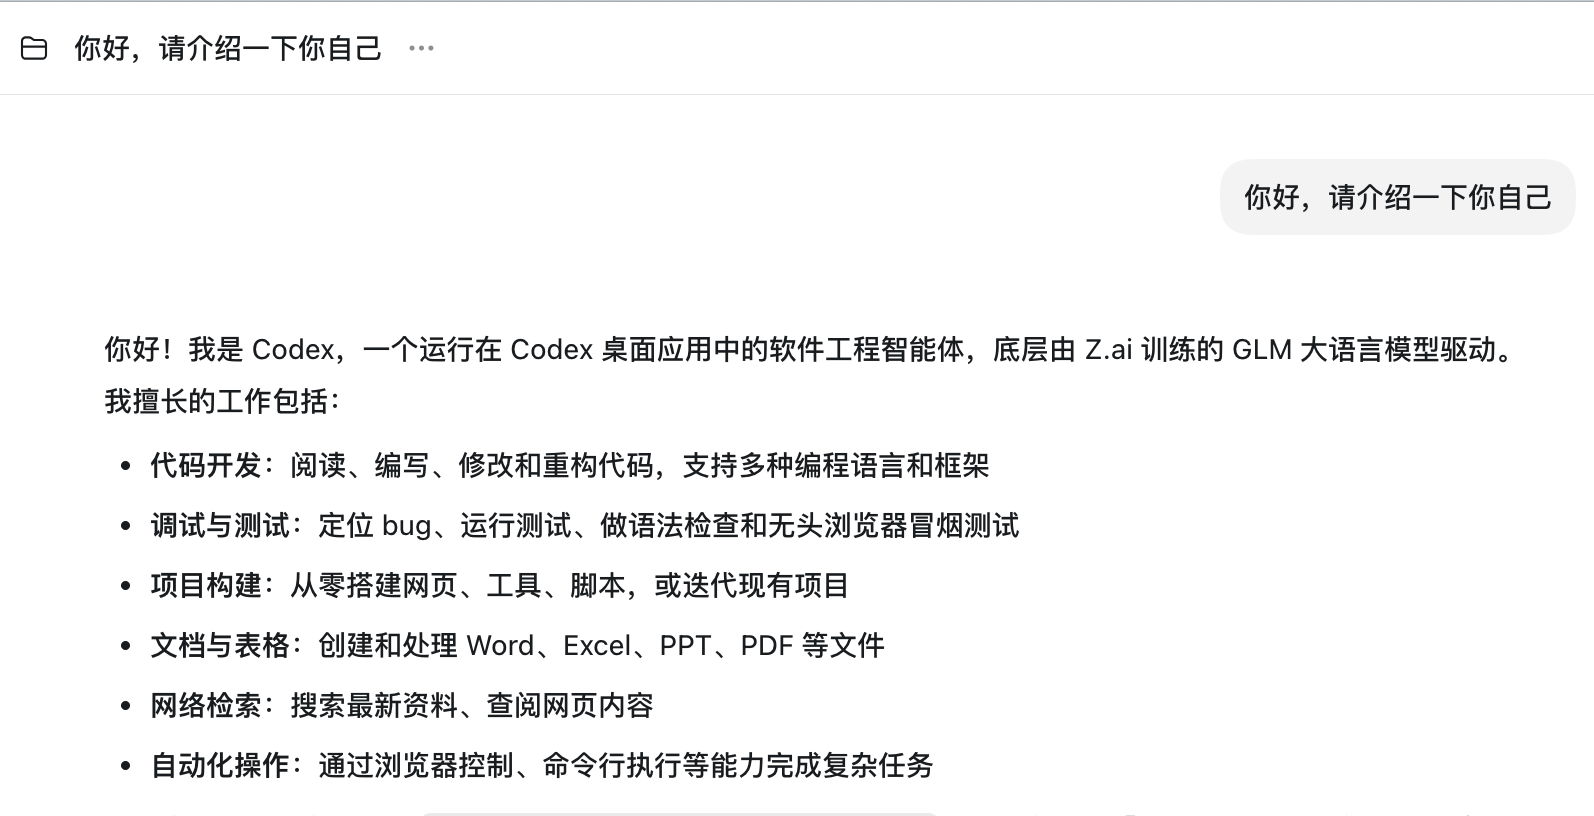
打开一个新对话,输入:
你好,请确认你当前使用的模型是什么?
如果收到如下回复,说明配置成功了。

我踩的几个坑
坑 1:模型目录文件格式不对
models.json 的 JSON 格式必须严格正确,少一个逗号、多一个引号都会导致模型列表加载失败。
建议写完后用 JSON 校验工具检查一下。
坑 2:配置改了不生效
每次改完 config.toml 或 models.json,必须完全关闭 Codex 再重新打开,只刷新对话是没用的。
如果还是不生效,检查一下:
- 文件路径对不对
- TOML 格式有没有问题
- API Key 有没有复制完整
实际体验怎么样
配置完用了下,说几个直观感受:
优点:
- 速度快,非高峰时段响应很流畅
- 多模态能力实用,截图丢进去就能分析代码问题
- 价格香,Coding Plan 额度够日常用,周末还半价
- 中文理解比国外模型好,写中文文档、做中文项目更顺手
不足:
- 复杂推理任务和 DeepSeek V4 Pro、GPT-5 还有差距
- 工具调用的稳定性偶尔抽风,需要多试一次
- 我的用法:
- 日常写代码、改 bug、做副业项目 → GLM-5.3-Flash ,minimax(够用、便宜)
- 特别复杂的架构设计、疑难杂症 → 切 KIMI K3 ,DeepSeek V4 Pro
- 前端 UI 开发、视觉相关任务 → KIMI K3(多模态有优势)
写在最后
AI 编程工具现在选择越来越多了,不再是一家独大的局面。
对我们运维人来说,多掌握几个模型的配置方法,就多一个选择。哪个便宜用哪个,哪个好用用哪个,不把鸡蛋放一个篮子里。
GLM-5.3-Flash 作为国产模型,能做到这个水平已经很不容易了。日常开发、做副业、写工具,完全够用。
建议有 Coding Plan 的朋友都试试,反正额度用不完也是浪费。
如果这篇文章对你有帮助,欢迎点赞、在看、转发。
有问题评论区留言,我会一一回复。